

Installation Guide
If you're installing panels on a wall or surface frame that lacks a solid substructure, it's often necessary to add a few wall studs or install a layer of MDF or plywood beneath the panels to ensure adequate support.
It's advisable to keep the following factors in mind during the planning and design stages of your project.
Installation Guide - DECOHUB Wall Panels
Whether you're a professional or a DIY enthusiast, installation is easy. Simply follow the steps below and complete your project with the paint color of your choice.

Tools & Surfaces
You might need the following tools and materials to install your panels:
- Tape measure
- Stanley knife or utility knife for lengthwise cuts
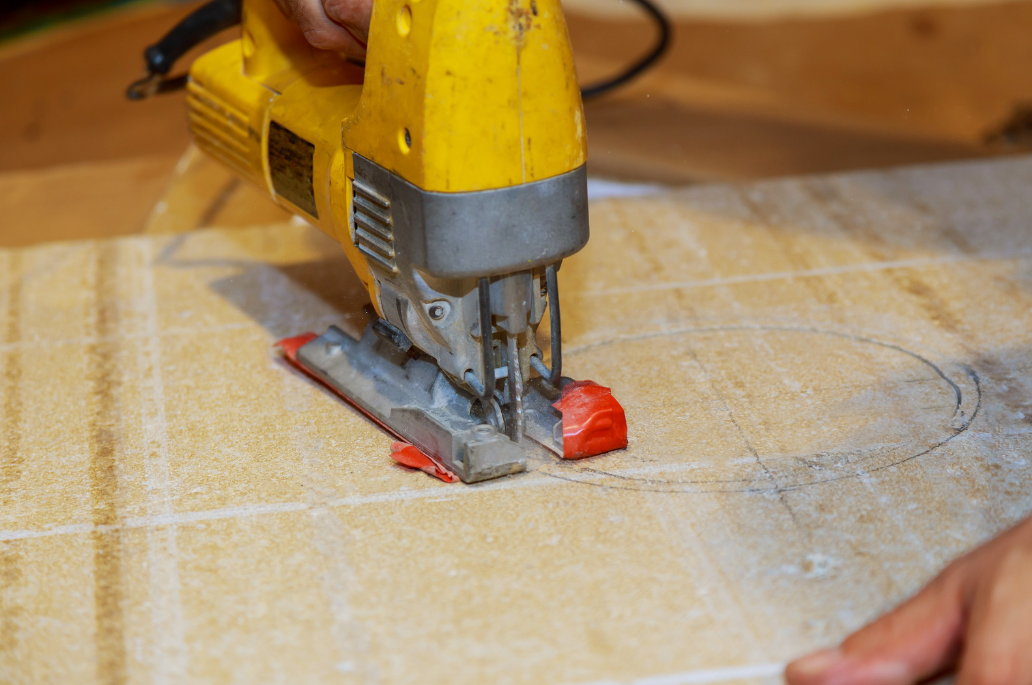
- Saw (hand saw, circular saw, or jigsaw — all with fine-tooth blades) for cutting across the panel design
- Mild detergent
- Adhesive — we recommend using Liquid Nails, available on HomeDepot or Amazon
- Waterproof silicone sealant (if installing in a bathroom), also available on HomeDepot or Amazon
Before you begin, make sure to clean the surface thoroughly using a suitable cleaner to remove any dust, dirt, or debris.

Measure & Cut
First, measure the available space and plan the best positioning and orientation for your panel installation.
Cut the panel to size on a sturdy, flat surface to ensure a clean and precise edge. Use a utility knife if the edges are within the flexible section of the panel; otherwise, use a hand saw or power saw.
Make sure the panel fits perfectly in the space before moving on to the next step.
Adhesive & Application
Apply Adhesive
For a strong and lasting bond, we recommend using a PVC adhesive such as Liquid Nails. Apply the adhesive to the back of the panel in a wave pattern, spacing it evenly to ensure full coverage. If the wall surface is uneven, use extra adhesive where needed.
Mount the Panel
Carefully press the panel onto the surface, applying firm and even pressure to ensure the adhesive spreads uniformly. As an alternative, you can use double-sided tape in multiple spots on the back of the panel. This helps hold the panel in place without needing to wait for the adhesive to set.
Tip: Before applying, make sure you’ve measured the area, planned the layout, and decided on the orientation of the panel for the best results.
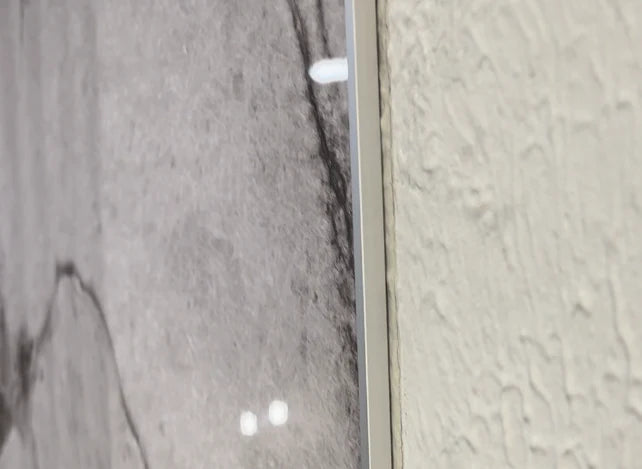
Installing H-Trim
Once the panel is secured to the wall, insert the H-Trim or Duplex H-Trim—whichever you prefer—along the edge of the panel. The panel will slide in smoothly, as the trim is designed to perfectly accommodate the panel’s 5mm thickness.
Important: If you're installing the panel in a shower or wet area, be sure to fill the edges of the H-Trim with clear silicone to prevent water ingress.
Use a spirit level (water level) to ensure the panel is straight and properly aligned during installation.
Continue Wall
Apply. the second wall panel in the same manner as the first panel, inserting it as before. Feel free to continue your design in any way you prefer.
Custom. the panels by cutting them to your desired size, ensuring you order the correct amount of connections needed for your project.
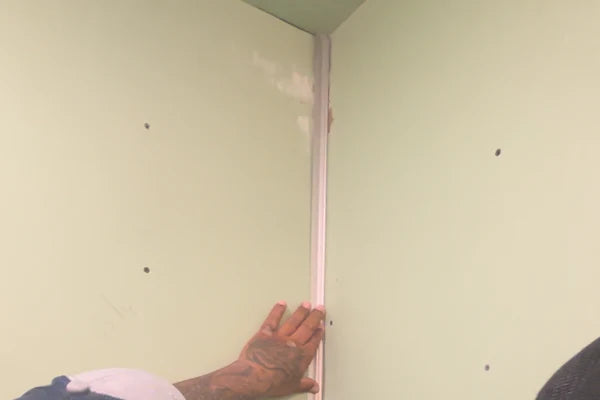
Installing Corners
Cut the inner corner profile to the required length.
For bathroom showers or other wet areas, apply clear silicone using a caulking gun along the back of the profile before positioning it in place. This ensures a waterproof seal.
In dry, non-wet areas, silicone is optional and not strictly necessary.
Before inserting your panel into the corner profile, seal the inside edges of the profile with clear silicone to enhance water resistance and prevent leaks.
Cap The Panel
Complete your installation by attaching the edge cap to the exposed edge of the panel.
If you’re installing in a shower or wet area, fill the inside of the edge cap with clear silicone to ensure a fully watertight seal. Then, slide the cap onto the side of the panel to securely enclose and protect the edge.
